

Choose how to start
Open Resumes in the dashboard sidebar and select New. The menu has three options:
The same three options appear on the Bring in your resume screen when your library is empty, on the Start another resume tile in grid view, and in the command palette (⌘ K or Ctrl K).
Draft with the agent and PDF or Word imports use hosted AI and count against your plan’s AI actions. See Plans
and usage.
Start a blank resume
1
Open the Create a new resume dialog
Select New, then Start blank.
2
Name the resume
Enter a Name, up to 64 characters. A general name such as “Product designer” works, or name it after the role you are applying for. Select the magic wand to generate a random name.
3
Set the slug and tags (optional)
Select More options to see Slug and Tags. The slug is filled in from the name and becomes part of the public link if you share the resume:
https://hiresweep.com/{username}/{slug}. Each slug must be unique among your resumes. Tags help you filter the library later.4
Create the resume
Select Create. To start with example content instead, open the menu next to Create and choose Create a Sample Resume.
What you see in the builder
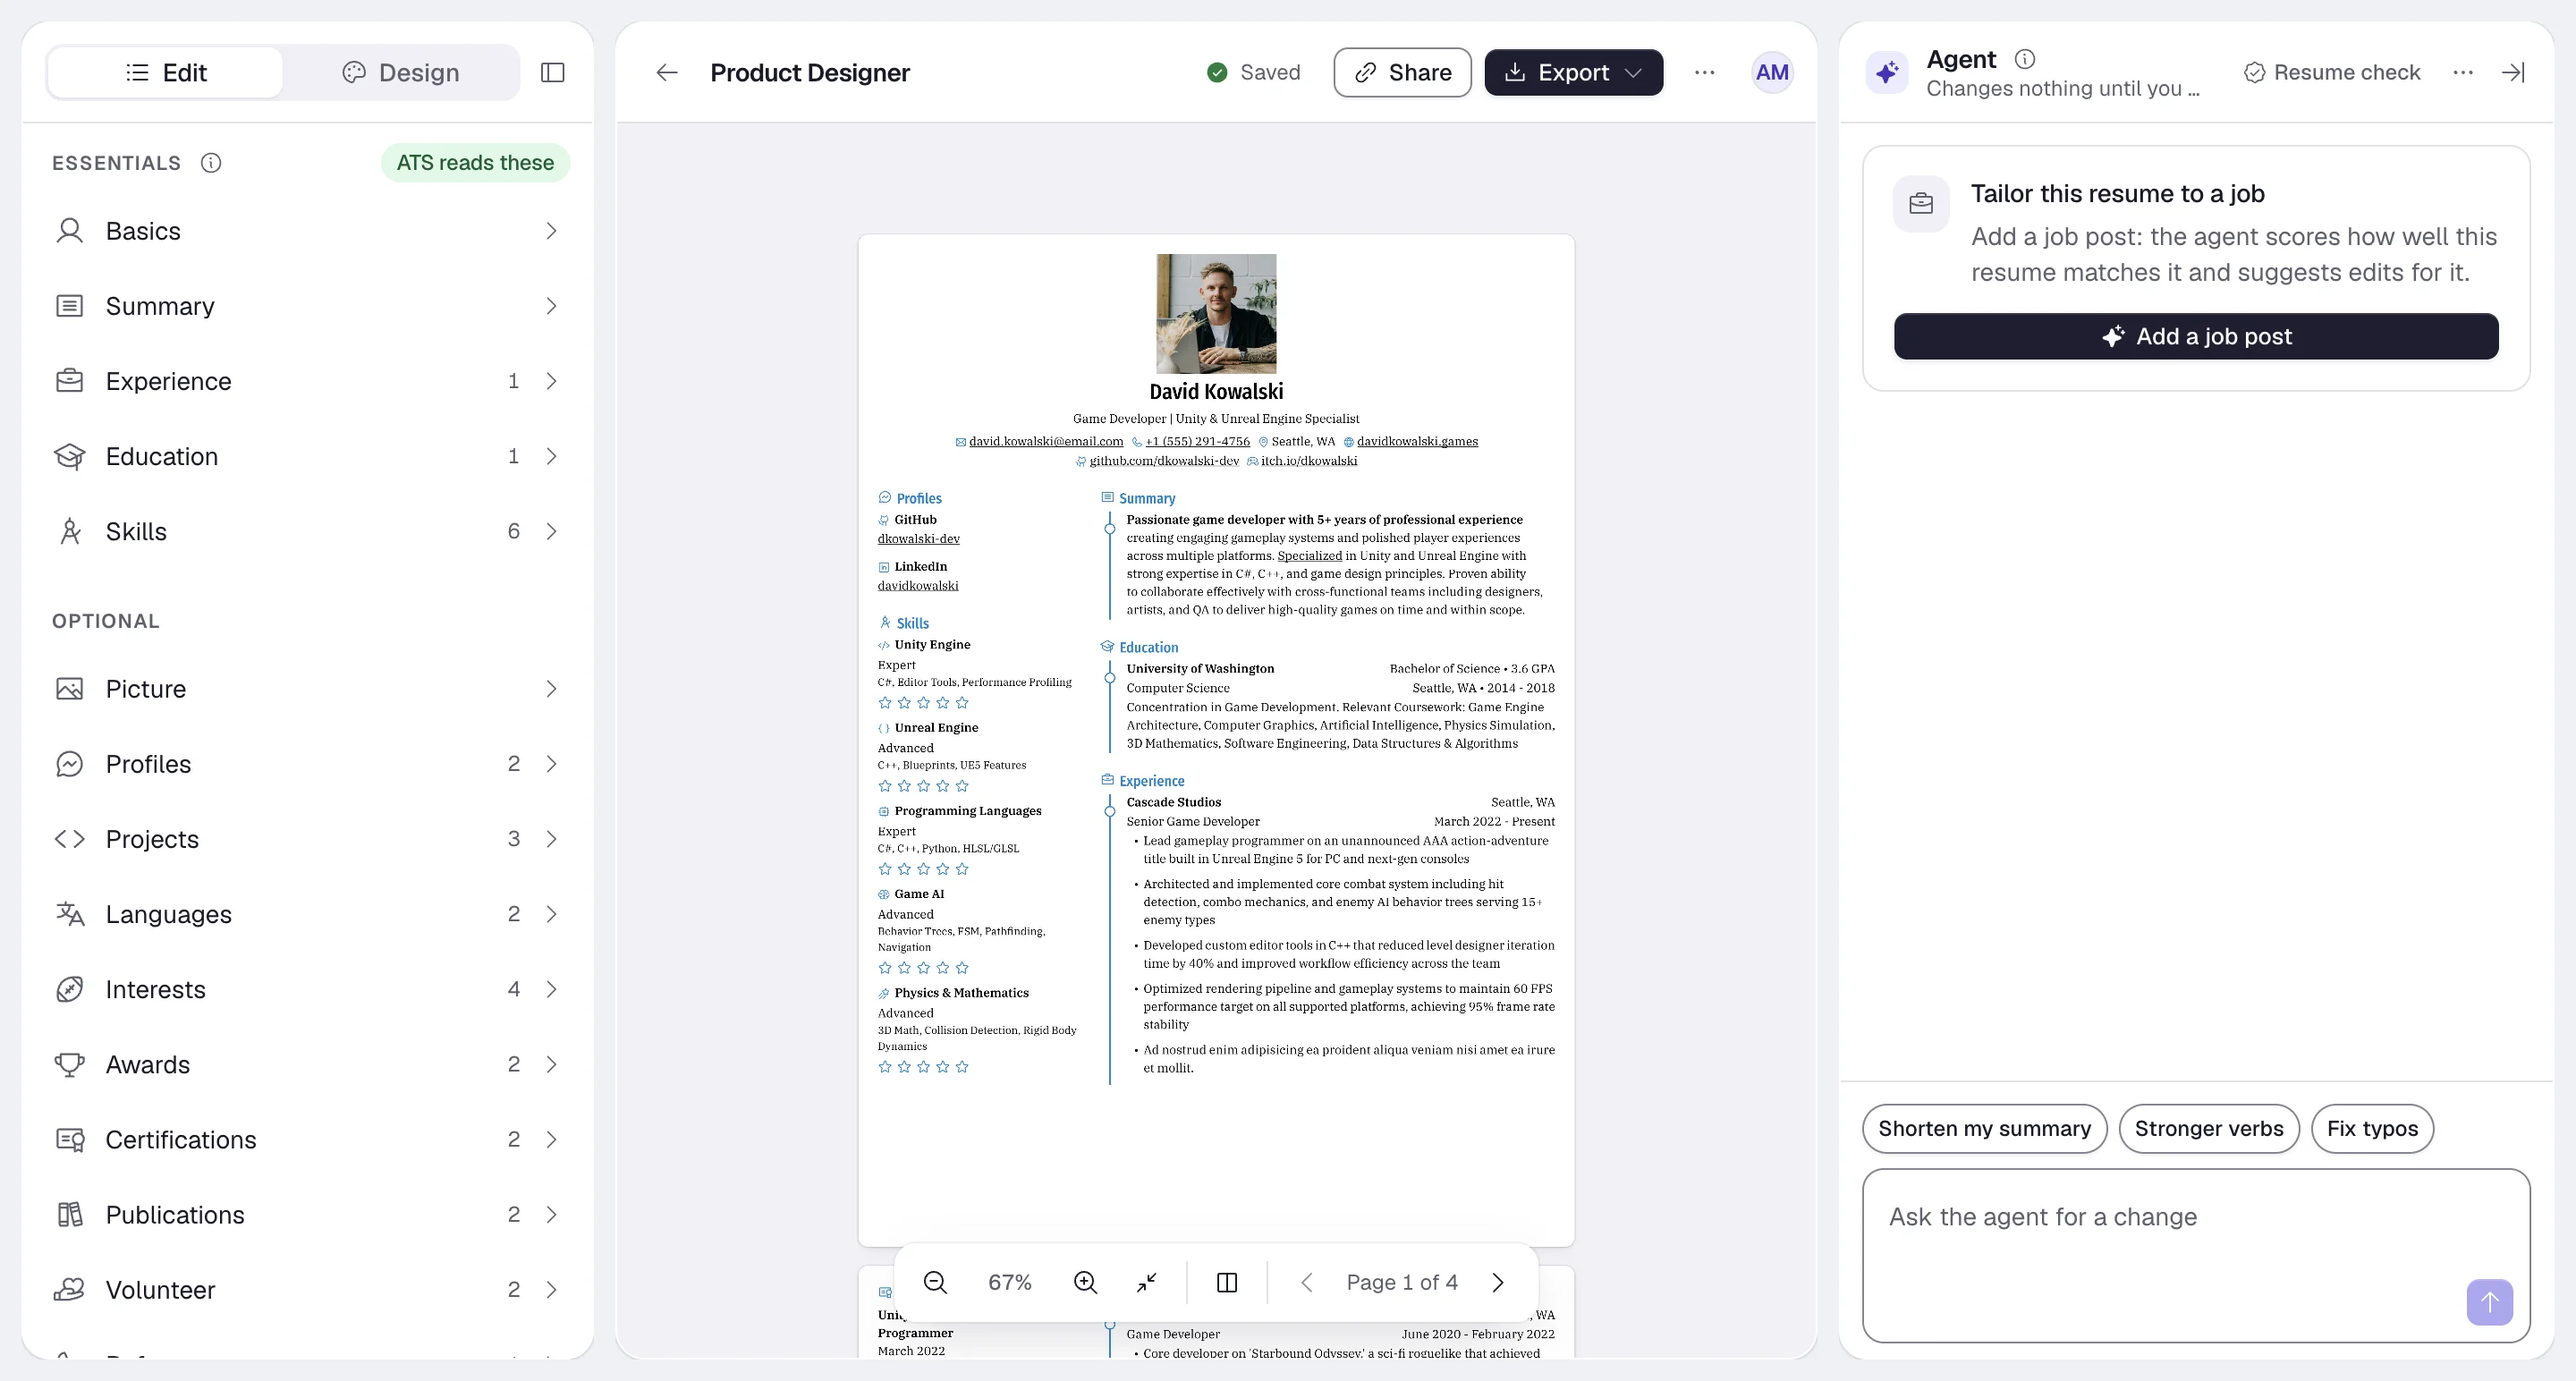
Changes save automatically. The chip next to the resume name shows Saving… and then Saved. Press ⌘ S or Ctrl S to save right away.
On a phone, the builder shows one area at a time, with Agent, Resume, Edit and Design tabs at the bottom.
Next steps
- Fill in your content: Editing resume sections
- Pick a look: Choosing a template and Designing your resume
- Get a file: Exporting your resume
- Keep several versions organized: Managing resumes from the dashboard